

How to Maintain Lash Extensions Between Fills
Table of Contents
- Your Between-Fill Routine: Morning, Evening, and Weekly
- How to Clean Lash Extensions Without Loosening the Bond
- Choosing the Right Lash Extension Cleaning Brush
- How Long Do Lash Extensions Last Between Fills?
- What to Avoid with Lash Extensions: Products, Habits, and Environments
- When Something Feels Off: Sparse, Twisted, or Irritated Lashes
- How Lifestyle, Sleep, Skincare, and Makeup Affect Lash Retention
- When to Book Your Next Fill and What to Tell Your Lash Artist
- Frequently Asked Questions
Last Updated: October 6, 2026
Your Between-Fill Routine: Morning, Evening, and Weekly
Learning how to maintain lash extensions between professional fills comes down to a simple routine you can repeat on autopilot. At Lashes by Shigeru, we tell every client the same thing: your extensions only look expensive when your daily habits protect them. The good news is that a solid between-fill routine takes about five minutes a day.
Here is the schedule we recommend, broken into three parts.
| Time | Task | Time Needed | Frequency |
|---|---|---|---|
| Morning | Brush lashes with a clean spoolie, rinse with cool water | 1 minute | Daily |
| Evening | Cleanse the lash line with an oil-free lash cleanser | 2-3 minutes | Daily |
| Weekly | Deeper cleanse, check for twists or gaps, review products | 5 minutes | 2-3 times a week |
Morning: Brush, Rinse, and Go
Start your day by brushing your lash extensions with a clean spoolie. Work from the middle of the lash out toward the tip, never down at the root. Then rinse your face with cool water and pat the eye area dry. Skip the towel rub. A common mistake is tugging at lashes right after waking, when they’ve been pressed against a pillow for hours.
Evening: Cleanse Away the Day
Nighttime is when lash hygiene matters most. Makeup, sweat, and natural oils collect along the lash line all day. If they sit overnight, they weaken the adhesive bond. Use an oil-free lash cleanser, a soft brush, and lukewarm water. Close one eye, cleanse gently, and rinse. Repeat on the other side. Then let your lashes air dry before bed.
Weekly: A Deeper Clean and a Quick Check
Two to three times a week, give your extensions a slightly longer cleanse. Take an extra minute to check for sparse patches, twisted lashes, or any tenderness along the upper eyelid. This quick check catches small problems before they turn into premature shedding. It also helps you spot when it’s time to book your next fill.
A clean, dry spoolie is your best free tool. Wash yours with a drop of gentle soap once a week and let it air dry. A dirty brush just moves oils back onto the lash line.
How to Clean Lash Extensions Without Loosening the Bond
The right way to clean lash extensions is to use an oil-free cleanser, lukewarm water, and a soft brush, working along the lash line with light pressure.
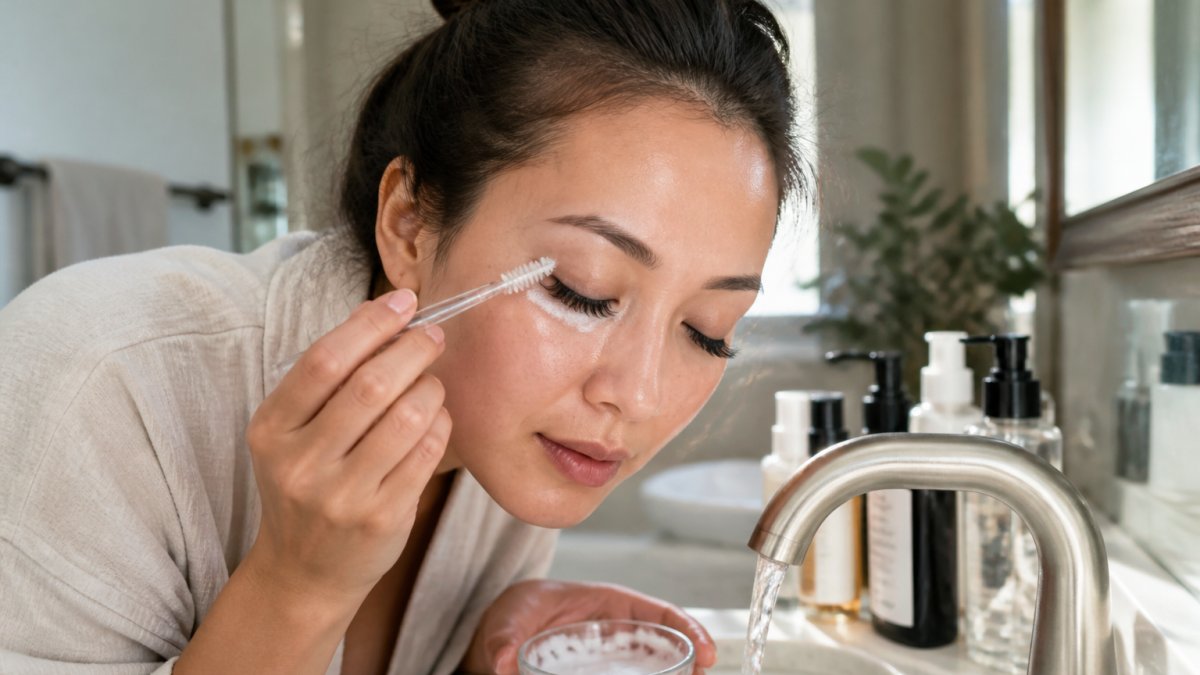
Follow these steps:
- Wet your closed eye with lukewarm water. Keep the temperature at or below what you’d use on a baby’s bath, hot water softens adhesive.
- Apply a small amount of oil-free lash cleanser to a soft brush. A pea-sized amount is enough for both eyes; more cleanser means more rinsing, and leftover residue attracts oil.
- Gently sweep along the lash line, top and bottom of the extensions. Hold the brush at a slight angle so the bristles reach the base of the lashes without pressing into the eyelid. Use short, side-to-side strokes rather than long sweeps.
- Rinse with cool water until no residue remains. Tilt your head back so water runs away from the eye, not into it.
- Blot dry with a lint-free cloth, then brush with a clean spoolie. Blot, don’t rub. A microfiber cloth or a clean paper towel works; terrycloth towels snag lashes.
- Let lashes air dry fully before applying any makeup. Damp lashes are more likely to clump and set in odd directions.
Drying matters as much as washing. If you go to bed with damp lashes, they can press into odd shapes overnight, and the moisture can soften adhesive at the base.
How often should you cleanse? Daily is the standard recommendation, and twice a day is fine if you wear eye makeup or work out.
Rubbing your eyes after cleansing is the fastest way to lose extensions. The friction pulls hairs before the adhesive has fully settled. If your eyes itch after cleansing, pat the area with a cool, damp cloth instead of rubbing.
A note on cleanser choice: look for a formula labeled oil-free and pH-balanced for the eye area. Foaming lash cleansers are popular because they rinse clean, but a gentle gel works too. Avoid bar soap, which can leave a film, and avoid anything with added fragrance near the lash line.
Choosing the Right Lash Extension Cleaning Brush
The best lash extension cleaning brush has soft, fine bristles and a small head. A stiff brush scratches the lash line, and a wide brush misses the space between individual lashes.
A few things to check before you buy:
- Bristles are soft and flexible, not scratchy
- Head is narrow enough to reach the lash line
- Handle is easy to hold with wet hands
- Bristles don’t shed during cleansing
- The brush can be cleaned and air-dried
Keep two brushes on hand: one for daily cleansing, one as a backup while the first dries. Replace yours every few weeks, since bristles collect oils and residue over time.
How Long Do Lash Extensions Last Between Fills?
Lash extensions typically last two to three weeks between fills, depending on your natural lash cycle, lifestyle, and how well you care for them. Every natural lash sheds on its own schedule, so some loss is normal and expected.
A few factors shorten that window:
- Sleeping face-down or on one side
- Heavy eye rubbing or touching
- Oil-based skincare near the eyes
- Steam, saunas, and hot yoga
- Skipping daily cleansing
At Lashes by Shigeru, our Japanese AirLash® technique pairs virtually weightless extensions with in-house adhesives, and clients often see results lasting up to five weeks.
What to Avoid with Lash Extensions: Products, Habits, and Environments
What to avoid with lash extensions comes down to three categories: oil-based products, friction, and heat or moisture. Each one weakens the bond between the extension and your natural lash.
Products to skip:
- Oil-based cleansers, makeup removers, and eye creams. Check the ingredient list for oils like coconut, jojoba, argan, and mineral oil, which are common in eye products.
- Waterproof mascara and eyeliner. Removing them requires oil-based remover or friction, both of which damage the bond.
- Lash serums with oil carriers near the lash line. Growth serums applied to the lash line can migrate into the adhesive.
- Heavy creams that migrate into the eye area overnight. If you wake up with product in your lashes, your night cream is too close.
- Cleansing balms and micellar waters that contain oils. Many “gentle” formulas still leave an oily residue.
Habits to break:
- Rubbing or pulling at lashes. This is the single most common cause of premature shedding.
- Sleeping face-down. Side-sleeping is less damaging than face-down, but both create friction. A silk or satin pillowcase reduces it.
- Picking at loose extensions. If an extension is twisting or lifting, leave it for your artist, pulling it can take the natural lash with it.
- Using a lash curler on extensions. The mechanical pressure can crimp or snap the extension.
- Applying skincare after lash care. Skincare goes on first, then lash cleansing, so products don’t sit on the lash line.
Environments to watch:
- Steam rooms, saunas, and hot showers. Occasional exposure is fine; daily steam is not.
- High humidity for long stretches. A steamy bathroom is fine, but living in a humid climate means being more diligent about drying lashes fully.
- Chlorinated pools and saltwater. Rinse with cool water after swimming and dry gently.
- Hot yoga and intense cardio. Sweat and heat together are hard on adhesive; cleanse after.
The first 24 hours after application matter most. Most adhesives need a curing window, so avoid water, steam, and sweat during that period. A six-hour wait is the common minimum, but we recommend a full day to be safe.
If you’re unsure whether a product is lash-safe, test it on the back of your hand first. If it leaves a slick or oily film, keep it away from your lash line.
One more trade-off worth knowing: you don’t have to give up makeup entirely. Oil-free foundation, powder eyeshadow, and oil-free eyeliner are all fine. The key is removal, use a lash-safe cleanser and gentle pressure, not a wipe or pad dragged across the eye.
When Something Feels Off: Sparse, Twisted, or Irritated Lashes
Sparse, twisted, or irritated lashes are usually a sign of a routine issue, not a failed application. Sparse patches often mean oils or friction are breaking down the bond.
Handle each issue like this:
- Sparse patches: Review your cleanser and skincare. Book a fill sooner than planned.
- Twisted lashes: Brush gently with a clean spoolie. If they stay twisted, leave them alone.
- Mild irritation: Stop all products near the eye. Rinse with cool water.
- Redness or swelling: Contact your lash artist right away.
Never fix gaps with DIY lash clusters or lash glue. Home adhesives are not formulated for the eye area, and clusters add weight that can pull natural lashes. If a gap bothers you, book a fill with your lash artist instead.
Most “problems” between fills trace back to oil, friction, or heat. Fix the habit and the lashes usually recover at your next fill.
How Lifestyle, Sleep, Skincare, and Makeup Affect Lash Retention
Lash retention depends as much on your daily habits as on the application itself. Sleep position, skincare routine, and makeup choices all play a role.
Sleep on your back or use a silk pillowcase to reduce friction. Keep eye creams and serums away from the lash line.
A few habits that help:
- Wash your pillowcases weekly
- Apply skincare before lash care, not after
- Let lashes dry fully before applying makeup
- Skip waterproof products entirely
Individual variation matters too. Some clients naturally shed lashes faster than others. Your fill schedule should match your own cycle, not a generic timeline.
When to Book Your Next Fill and What to Tell Your Lash Artist
Book your next fill every two to three weeks, or sooner if you notice significant shedding. Come in with clean lashes and a short list of what you’ve noticed.
Tell your lash artist:
- Any new products you’ve started using
- Where you’re seeing the most shedding
- Any tenderness, itching, or redness
- Whether your routine has changed
At Lashes by Shigeru, our team reviews your aftercare at every appointment and adjusts your fill schedule to your natural lash cycle.
For more on lash-safe products and aftercare guidance, see the American Academy of Dermatology’s eye care guidance on protecting the eye area, and the U.S. Food and Drug Administration’s cosmetics safety information on cosmetic product safety.
Frequently Asked Questions
How long do lash extensions last between fills?
Most lash extensions last two to three weeks between fills, depending on your natural lash growth cycle and how well you care for them. Each natural lash sheds on its own schedule, so you will gradually lose extensions over time. Booking a fill every two to three weeks keeps your set looking full. If you notice faster shedding, review your cleansing routine, oil exposure, and sleep habits.
How often should you clean lash extensions between fills?
Clean your lash extensions two to three times a week with an oil-free lash cleanser and a soft brush. Gentle cleansing removes dirt, oil, and makeup that can weaken the lash adhesive and cause irritation along the lash line. If you wear eye makeup or exercise often, cleanse daily. Always dry lashes gently with a lint-free cloth and brush them back into shape with a clean spoolie.
What should you avoid doing with lash extensions?
Avoid oil-based products around the eyes, rubbing or pulling your lashes, waterproof mascara, and steam or saunas within the first 24 hours after application. Skip lash curlers entirely, since they can crimp and break the extension bond. Also avoid picking at loose extensions; let a professional remove them. These habits protect the adhesive and help prevent premature shedding.
Can you brush lash extensions every day?
Yes, brushing daily with a clean spoolie is safe and recommended. Brush gently from the mid-lengths to the tips to separate lashes and keep them looking neat. Avoid pressing the brush into the lash line or tugging at the roots, which can loosen the bond. If lashes feel stuck together or twisted, mention it at your next fill rather than trying to fix it yourself.
Your extensions can look freshly applied for weeks, but only if your between-fill routine holds up. Oil-free cleansing, gentle brushing, and a consistent fill schedule do most of the work. Lashes by Shigeru pairs our proprietary Japanese AirLash® technique with in-house adhesives, hypoallergenic formulas, and virtually weightless extensions designed for sensitive eyes. Book an appointment with Lashes by Shigeru and keep your lashes looking full from one fill to the next.