
7 Japanese Lash Methods That Prevent Natural Lash Damage
Last Updated: October 31, 2026
Quick Summary
Preventing lash damage with Japanese methods means following application standards that work with the natural lash: isolating each lash one-to-one, matching extension weight and length to lash strength, and placing a thin adhesive bead at the base without touching the skin. Consistent aftercare and on-time refills protect lashes between appointments.
- Every extension should be bonded to one isolated natural lash, never to a cluster.
- Fine, weak lashes should get shorter lengths, light curl, and classic technique only.
- Keep lashes completely dry for the first 24 hours after application.
- Never use a lash curler on extensions because pressure can snap the natural lash.
- Natural lashes grow, rest, and shed roughly every 60 to 90 days.
Table of Contents
- Why Japanese Lash Techniques Are Gentler on Natural Lashes
- Step 1: Choose the Right Lash Style for Your Natural Lash Strength
- Step 2: Master Glue Amount, Placement, and Drying Time
- Step 3: Follow a Japanese Lash Extension Aftercare Routine
- Step 4: Stick to a Lash Extension Refill Schedule That Protects Natural Lashes
- Preventing Damage from Eyelash Extensions: Daily Habits That Matter
- Spotting Normal Shedding vs. Lash Damage: A Growth-Cycle Guide
- Book a Japanese AirLash® Consultation to Protect Your Natural Lashes
- Frequently Asked Questions
Why Japanese Lash Techniques Are Gentler on Natural Lashes
Preventing lash damage with Japanese methods starts with one core idea: work with the natural lash, never against it. But “Japanese methods” is used loosely online, so it helps to separate what is actually a technique standard from what is marketing language.
What “Japanese methods” actually means
In practice, the term describes a set of application standards rather than a single product, brand, or style. The consistent elements are:
- Isolation: every extension is bonded to one isolated natural lash, never to a cluster.
- Weight control: extension weight and length are matched to the thickness and strength of the natural lash.
- Precise adhesive placement: a thin bead sits at the base of the extension with a small gap from the skin, never a thick band across the lash line.
- Sanitation and patch testing: tools are sterilized, adhesives are fresh, and new clients are patch tested before a full set.
A few claims, such as “Japanese glue is always gentler,” are marketing language with no fixed definition. The reliable test is whether a stylist can explain isolation, weight checks, and adhesive placement specifically.
The one-to-one application principle
Classic one-to-one application attaches a single extension to a single natural lash. That sounds basic, but it changes everything about lash health.
A common mistake is attaching two or three natural lashes to one extension. This bonds lashes that grow at different speeds. When one sheds, it can pull its neighbors with it.
Proper lash isolation prevents this. Each extension moves on its own, and each natural lash keeps its own growth cycle.
How sensitive LED lash extensions reduce adhesive exposure
Traditional lash glue cures in open air, which means fumes linger near the eye.
Ask your stylist three questions before booking: How do you isolate lashes? How do you check extension weight against my natural lash? Where does the adhesive sit relative to my skin? Specific answers are the clearest sign of a genuine Japanese-method approach.
What the method does not promise
Adhesive reactions, irritation, and traction damage can occur with poor technique or skipped aftercare. Consistent aftercare matters as much as the application itself.
Step 1: Choose the Right Lash Style for Your Natural Lash Strength
The right lash style matches your natural lash strength, not a photo on your phone. Extension weight and extension length both load the natural lash.
Here is how we think about matching style to lash strength:
- Fine, weak lashes: shorter lengths, light curl, classic technique only
- Medium lashes: classic or light hybrid sets
- Strong, dense lashes: hybrid or volume sets with careful weight checks
- Sparse lashes: shorter extensions spread across available lashes
Volume lash extensions are not automatically risky. They become risky when the artist skips the weight check. Ask your stylist how they measure extension weight against your lash thickness. A good answer is specific.
Watch out: a stylist who promises any length or curl you want, no questions asked, is not protecting your natural lashes.
Step 2: Master Glue Amount, Placement, and Drying Time
Glue amount and adhesive placement decide whether a set lasts or fails. Too much lash glue creates a heavy, clumpy bond. Too little gives poor retention and early lifting.
The correct approach is a thin bead placed at the base of the extension, never touching the skin.
Three things to check at every appointment:
- The adhesive sits on the lash, not the skin
- No lashes are stuck together at the base
- The bond looks thin and even, not thick and dark
If the base of your set feels heavy or looks like a solid black line, the glue amount was too high.
Step 3: Follow a Japanese Lash Extension Aftercare Routine
Japanese lash extension aftercare is short, but it has to be consistent. The first 24 hours matter most. Keep the lashes dry, avoid steam, and skip eye makeup.
After that, a simple daily routine protects your investment:
- Clean lashes daily with a gentle foam cleanser and a soft brush
- Rinse with cool water and pat dry, never rub
- Brush lashes with a clean spoolie when dry
- Avoid oil-based products near the lash line
- Skip waterproof mascara entirely
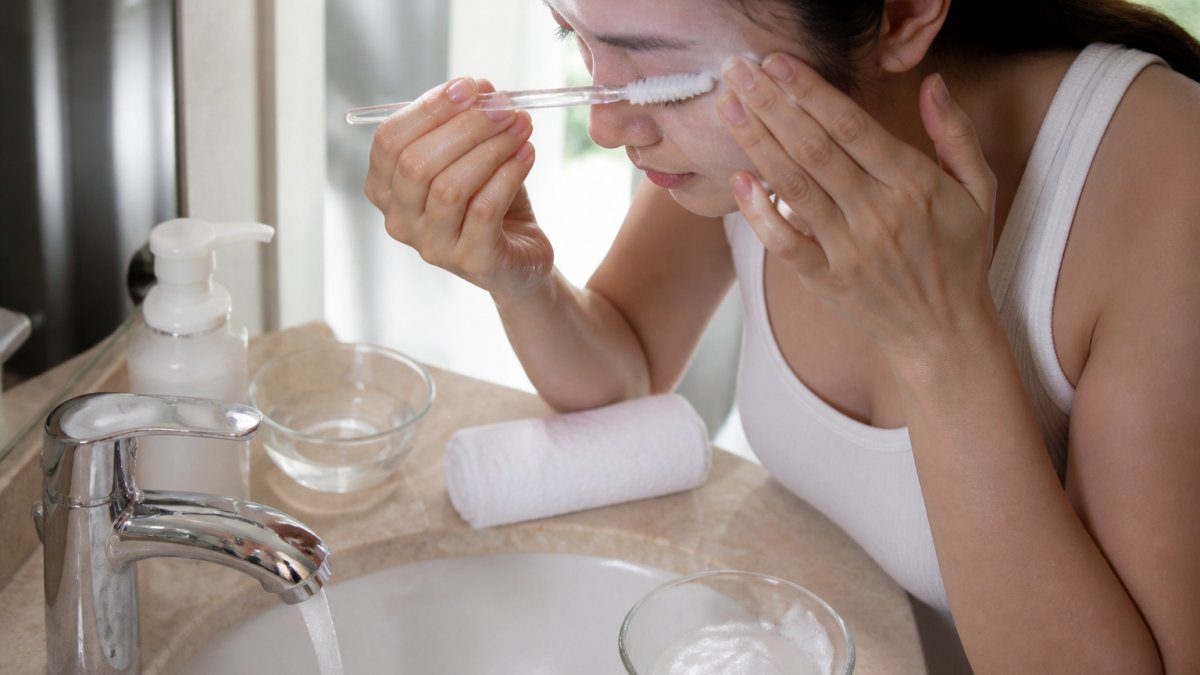
A step-by-step routine from day one through refill
A single practical sequence, matched to how Japanese-method sets are built, looks like this:
- Day 1 (first 24 hours): Keep lashes completely dry. No steam, sauna, swimming, or eye makeup. Sleep on your back if you can to avoid pressing the set into the pillow.
- Day 2 onward, morning: Brush with a clean spoolie, then cleanse with a gentle foam cleanser using a soft brush in downward strokes. Rinse with cool water and pat dry with a lint-free cloth.
- Day 2 onward, evening: Repeat the cleanse if you wore eye makeup or sunscreen. Check the lash line for lifting, twisting, or stuck-together bases.
- Weekly: Inspect for gaps and note any lashes pointing sideways. Book a refill at the first sign of uneven weight rather than waiting for a full set to grow out.
- Before refill: Arrive with clean lashes and disclose any itching, redness, or swelling since the last appointment.
For a routine that fits a packed schedule, see our guide to lash extension aftercare for busy schedules. It covers quick daily habits and smart product choices.
Aftercare for sensitive eyes and adhesive reactions
Irritation is the most under-discussed part of aftercare. If you have a history of adhesive allergies, eye surgery, or sensitive skin, say so at booking.
Stop treatment and consult a clinician if you notice:
- Burning or stinging that persists after the appointment
- Redness, swelling, or a rash along the lash line
- Blurred vision, discharge, or a foreign-body sensation
- Lashes that feel painful when touched
Do not try to remove a reacting set at home. Professional removal limits further adhesive exposure and reduces the risk of pulling natural lashes.
Conditioners: what helps and what to question
Conditioning is recommended in almost every lash-care guide, but the evidence is thinner than the marketing suggests.
Be cautious with products marketed as lash growth serums. Some contain prostaglandin analogs, which are prescription medications in the United States and carry side effects including iris color change and eyelid darkening. If a product promises dramatic growth, check its ingredients and talk to an eye care professional before use. A balanced approach is to treat conditioning as cosmetic support, not as damage repair.
Oil-based cleansers, waterproof mascara, and harsh makeup removers break down lash adhesive and increase the chance of premature lifting. If a product stings or requires rubbing, it does not belong near a Japanese-method set.
Step 4: Stick to a Lash Extension Refill Schedule That Protects Natural Lashes
A lash extension refill schedule protects natural lashes by keeping weight balanced. Waiting longer means more grown-out lashes and heavier load on the ones still bonded.
Signs you need a refill sooner:
- Gaps along the lash line
- Extensions twisting or pointing sideways
- Noticeable lash shedding beyond the normal cycle
- Discomfort when you rub your eyes
Skipping refills does not “rest” your lashes. It usually means the next appointment takes longer and costs more. Our article on the signs you need a lash refill explains how often to book based on your growth cycle.
Preventing Damage from Eyelash Extensions: Daily Habits That Matter
Preventing damage from eyelash extensions comes down to small habits repeated daily. Most lash damage we see is not caused by the extensions themselves. It comes from how people treat them between appointments.
Curling, mascara, and makeup removal without breakage
Never use a lash curler on extensions. The mechanical pressure cracks the adhesive bond and can snap the natural lash.
For mascara, use non-waterproof formulas only, and only on the tips if at all. Waterproof mascara requires harsh removers that break down lash adhesive.
For makeup removal, use a water-based remover and gentle downward strokes. No rubbing, no tugging.
For a full prevention checklist, read our guide on how to prevent lash extension damage. It covers safe cleaning methods and how to protect your natural lashes.
Spotting Normal Shedding vs. Lash Damage: A Growth-Cycle Guide
Normal lash shedding is part of a healthy growth cycle. Every natural lash grows, rests, then sheds, roughly every 60 to 90 days. Losing a few lashes a day is normal.
Lash damage looks different. Watch for these signs:
| Signal | Normal Shedding | Possible Lash Damage |
|---|---|---|
| Lash loss | A few per day, even | Clumps, bald patches |
| Natural lash look | Full, even length | Short, stubby, thin |
| Feeling | No pain | Itching, burning, redness |
| Timing | Steady over weeks | Sudden after a set |
A peer-reviewed study on ocular disorders from eyelash extensions found that extension procedures may cause eye irritation, including allergic reactions. A separate national survey on lash extensions and health problems examined related health complaints.
If you notice a burning sensation, redness, or swelling, remove the set and see a doctor. Do not wait it out.
Book a Japanese AirLash® Consultation to Protect Your Natural Lashes
Protecting natural lashes is a technique decision before it is a product decision. The right isolation, weight, adhesive placement, and refill timing do more for lash health than any single serum.
That is exactly what the Japanese AirLash® method is built around. Every set uses virtually weightless extensions and our in-house adhesives. Our master stylist Shigeru Hanai brings over a decade of experience from Tokyo and New York. Results last up to five weeks.
If LED curing interests you, our guide to LED lash curing technology explains how it limits adhesive exposure.
Frequently Asked Questions
How can I prevent damage to my natural lashes from extensions?
Choose a stylist who uses one-to-one application and isolates each natural lash before attaching an extension. Keep glue amount minimal and ensure full drying time. Follow a daily aftercare routine with gentle cleansing and nightly conditioning. Stick to a refill schedule of every two to three weeks so weak or shed lashes are replaced before they tug on neighbors. Avoid waterproof mascara and harsh removals.
What makes Japanese eyelash extension techniques different?
Japanese methods emphasize precision: isolating each natural lash, applying a single extension in a one-to-one ratio, and using a controlled amount of adhesive. The focus is on protecting the natural lash growth cycle rather than maximizing volume. Sensitive LED lash extensions, like those used in the Japanese AirLash® technique, pair low-irritation adhesives with LED curing for faster, more comfortable drying. The result is a virtually weightless set.
Are Japanese lash extensions gentler on natural lashes?
They can be, when applied correctly. The one-to-one method avoids clumping multiple natural lashes onto one extension, which is a common cause of pulling and premature shedding. However, technique matters more than the label. Ask your stylist how they isolate lashes, what adhesive they use, and how they determine extension weight.
How often should I get lash extensions refilled to protect my natural lashes?
This keeps the set balanced as natural lashes shed on their growth cycle. Waiting longer can leave gaps where remaining extensions pull on isolated lashes, increasing the risk of lash damage. A consistent lash extension refill schedule also lets your stylist check for irritation, adhesive buildup, or weak lashes and adjust the design before problems start. If you notice excessive shedding or discomfort, book a refill sooner rather than trying to extend the wear time.
Your natural lashes deserve a plan, not a gamble. Lashes by Shigeru pairs the proprietary Japanese AirLash® technique with sensitive LED AirLash® application, hypoallergenic adhesives, and virtually weightless extensions designed to protect lash health. Get started with Lashes by Shigeru and book a consultation to build a lash plan around your natural lashes.

No Comments