
How to Clean Lash Extensions Properly at Home
Table of Contents
- Why Cleaning Your Lash Extensions Matters for Retention
- Essential Tools and the Best Lash Extension Cleanser
- How to Clean Lash Extensions Properly: Step-by-Step
- How Often to Clean Lash Extensions
- Building a Simple Lash Extension Aftercare Routine
- Common Mistakes That Weaken the Adhesive Bond
- Troubleshooting: When Cleaning Doesn’t Fix the Problem
- Frequently Asked Questions
Last Updated: September 24, 2026
Why Cleaning Your Lash Extensions Matters for Retention
Cleaning your lash extensions properly at home is the single biggest factor in how long they last. Skipping it lets oil, makeup residue, and sebum build up along the lash line, and that buildup breaks down the adhesive bond holding each extension in place.
The result? Premature shedding within days, not weeks.
Essential Tools and the Best Lash Extension Cleanser
The best lash extension cleanser is an oil-free, lash-safe formula made specifically for extensions. Regular face wash, micellar water, and anything with oils or glycols will weaken the adhesive bond and cause shedding.
Why Certain Ingredients Break the Bond
Lash extension adhesive is a cyanoacrylate (pubmed.ncbi.nlm.nih.gov). It cures into a rigid polymer that holds each extension to a single natural lash. That polymer is vulnerable to three things:
- Nonpolar oils and esters. Oils, plant butters, and many “nourishing” esters are nonpolar. They penetrate the cured adhesive and swell it, which is why an oil-based makeup remover can loosen a set in one or two uses.
- Glycols and alcohols. Propylene glycol, polyethylene glycol (PEG), and denatured alcohol are solvents. They don’t dissolve the bond instantly, but repeated exposure dries the natural lash and degrades the adhesive over a wear cycle.
- High-pH surfactants. Strong soaps and sulfates raise the pH at the lash line and strip the natural oils that keep the bond seated.
How to Read an Ingredient Label
Flip the bottle and scan the first five ingredients, that’s where the concentration lives.
- Red flags near the top: any oil (coconut, jojoba, argan, castor, mineral), any glycol (propylene glycol, PEG-anything), denatured alcohol, or sodium lauryl sulfate.
- Green flags: water as the first ingredient, gentle surfactants like cocamidopropyl betaine or decyl glucoside, and a pH buffer.
- Watch the marketing words. “Oil-free” on the front label doesn’t guarantee it, check the back. “Nourishing” and “conditioning” often mean oils or esters are present.
What to Look For in a Lash-Safe Cleanser
- Oil-free formula: oils dissolve cyanoacrylate adhesive on contact
- Low pH, gentle surfactants: cleans without stripping
- No glycols or alcohol: these dry out both extensions and natural lashes
- Rinses clean: no film left behind on the lash line
- Fragrance-free if you’re sensitive: added perfume is a common trigger for lash-line irritation
Tools You Need Beyond Cleanser
- Soft-bristled brush or lash bath brush
- Lint-free cotton swabs for the lash line
- Lukewarm water (never hot)
- Clean towel or paper towel for blotting
- A spoolie for separating lashes after drying
- A small squeeze bottle or foaming pump to control how much cleanser reaches the lash line
Using an oil-based remover or standard eye makeup remover on extensions is the fastest way to destroy a set. The oils break the adhesive bond within one or two uses, and you’ll see lash extensions falling out within days.
::: Switching to water-based cleansers preserves your investment while providing a safer way to remove long-wear makeup without compromising the integrity of the lash bond.
If you’re between lash-safe cleansers and need a stopgap, a diluted tear-free baby shampoo is the least-bad substitute, it’s oil-free and low-pH. It won’t remove heavy sebum as well as a dedicated cleanser, so treat it as a one- or two-day bridge, not a routine.
How to Clean Lash Extensions Properly: Step-by-Step
Learning how to clean lash extensions properly takes about two minutes once you build the habit. The key is downward brushing motions, gentle pressure, and thorough rinsing.
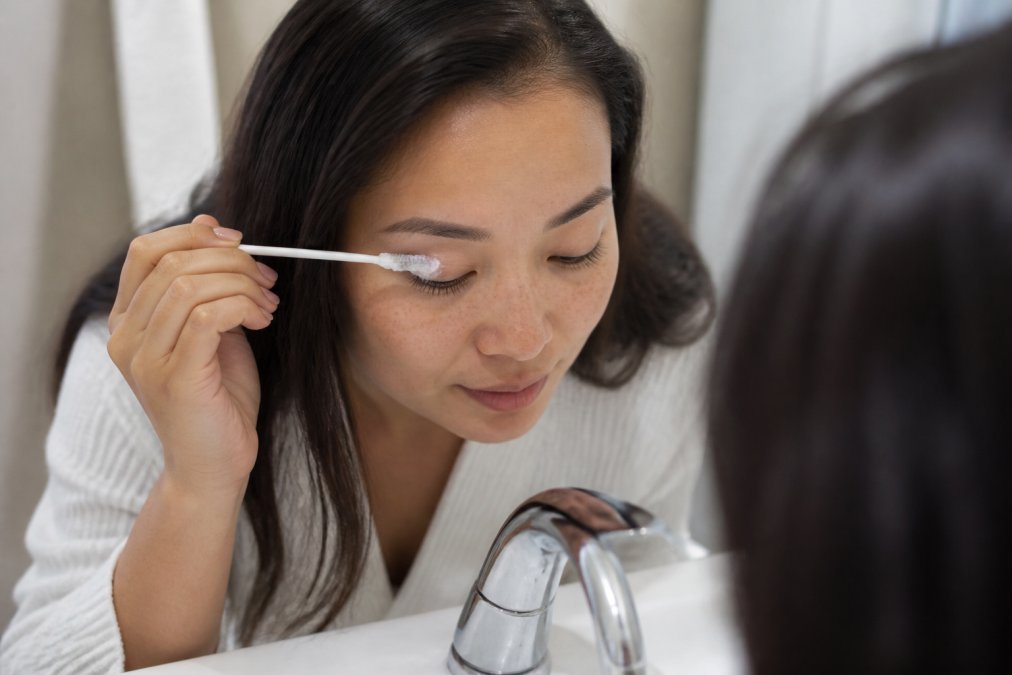
Step 1: Prep and Wet the Lash Line
- Wash your hands with soap and water.
- Wet your face with lukewarm water, keeping your eyes closed.
- Dispense a small amount of lash-safe cleanser onto your fingertip or brush.
Step 2: Cleanse, Rinse, and Dry
- Close one eye and gently brush the cleanser through the extensions using downward strokes.
- Use a lint-free cotton swab to clean along the lash line, where sebum and debris collect.
- Rinse thoroughly with lukewarm water until no foam remains.
- Blot dry with a clean towel, then air dry for a minute.
- Brush through with a spoolie to separate any lashes that stuck together.
The thing nobody tells you about lash baths: the rinse matters more than the cleanser. Leftover soap residue dries on the lash line and causes irritation that clients mistake for an adhesive allergy. Rinse twice as long as feels necessary.
How Often to Clean Lash Extensions
Clean lash extensions once daily, ideally at night as part of your skincare routine. If you wear makeup, sweat heavily, or have oily skin, a second gentle cleanse in the morning helps.
A quick reference:
| Situation | Cleansing Frequency | Why |
|---|---|---|
| Normal skin, no makeup | Once daily | Maintains adhesive bond |
| Oily skin or heavy workouts | Twice daily | Sebum breaks down adhesive |
| Daily eye makeup | Once daily, thorough | Prevents makeup residue buildup |
| Travel or camping | Once daily minimum | Debris and sweat accumulate fast |
Building a Simple Lash Extension Aftercare Routine
A lash extension aftercare routine doesn’t need to be complicated. It needs to be consistent.
- Morning: splash with lukewarm water, brush with a spoolie
- Evening: full lash bath with cleanser, rinse, blot, air dry
- Weekly: check for loose extensions and stray natural lashes
- Always: avoid oil-based products near the eyes
- Never: rub, pull, or pick at extensions
Common Mistakes That Weaken the Adhesive Bond
The biggest mistake is treating extensions like natural lashes. They need a different touch.
- Using oil-based cleansers, creams, or makeup removers
- Rubbing eyes or sleeping face-down on the lashes
- Picking at loose extensions instead of letting them shed naturally
- Skipping the rinse and leaving cleanser residue behind
- Brushing with a stiff brush or pulling through tangles
- Using waterproof mascara on extensions
Troubleshooting: When Cleaning Doesn’t Fix the Problem
If you’re cleansing daily and still seeing premature shedding, irritation, or clumping, the issue usually isn’t hygiene. Work through the symptoms below in order, most problems trace back to one of five causes.
Irritation, Redness, or Itching
Stop using the product immediately and rinse with lukewarm water. Irritation after cleansing has three common sources:
- Cleanser residue. Soap left on the lash line dries and pulls at the skin. Rinse longer than feels necessary.
- Fragrance or preservative sensitivity. Even “gentle” cleansers can trigger a reaction. Switch to a fragrance-free formula and see if it resolves within a few days.
- Adhesive sensitivity. If irritation appears within 24-48 hours of a fresh set and doesn’t improve after switching cleansers, it’s likely the adhesive, not your routine.
Extensions Clumping or Sticking Together
Clumping after a wash almost always means one of two things:
- Too much cleanser or insufficient rinsing. Residue acts like glue between fibers. Rinse until the water runs clear and no foam remains.
- Not drying thoroughly. Lashes that stay damp stick to each other as they dry. Blot, then brush through with a clean spoolie while still slightly damp, then let them air dry fully.
Shedding in Clusters or Patches
A single extension shedding with its natural lash attached is normal, that’s the natural lash’s growth cycle. What matters is the pattern:
- One or two per day, spread out: normal shed.
- Several at once, in one area: often a sign of rubbing, sleeping face-down, or trauma to that section.
- Patches along the lash line: could be an application issue (bond not cured properly) or an underlying lash-line condition. Book a professional assessment.
Bond Failing Within a Week
If a fresh set starts dropping within seven days, the cause is usually one of these:
- Oily lash line. Sebum breaks down adhesive faster than any cleanser. A mattifying primer at application helps.
- Product incompatibility. A new moisturizer, eye cream, or cleanser introduced after the set can be the culprit. Revert to your previous routine and see if retention improves.
- Application issue. Insufficient isolation, too much adhesive, or a humid environment during application all shorten wear. This is a stylist-side fix, not a home-care fix.
When to Wait vs. When to Call
| Symptom | Wait and adjust | Call a professional |
|---|---|---|
| Mild clumping after wash | Yes, re-rinse and re-dry | If it persists after two washes |
| One or two lashes shedding daily | Yes, normal cycle | If shedding accelerates |
| Redness or itching | Switch cleanser, monitor 48 hours | If it persists or worsens |
| Patchy shedding | No | Yes, likely application issue |
| Bond failing within 7 days | Check new products | Yes, stylist assessment |
The single most useful troubleshooting habit: change one variable at a time. Swap the cleanser, wait three days, observe. If you change cleanser, moisturizer, and pillowcase in the same week, you’ll never know which one fixed it, or caused it.
For clients in the greater Los Angeles area, our team at Lashes by Shigeru uses the proprietary Japanese AirLash® technique and sensitive LED AirLash®, with adhesives and cleansers we manufacture in-house. That means fewer variables and more predictable wear, up to five weeks per set for most clients. If you’ve had reactions to adhesives elsewhere, our hypoallergenic formulas and virtually weightless application are built for sensitive eyes.
Frequently Asked Questions
Can I use Dawn dish soap to wash my lash extensions?
No. Dish soap strips oils from the adhesive bond and can dry out the delicate skin along the lash line. Use a lash-safe cleanser formulated to be oil-free and pH-balanced instead. If you run out, a fragrance-free, oil-free foaming face wash works as a short-term substitute, but it won’t remove makeup residue as thoroughly as a dedicated lash cleanser.
How often should I perform a lash bath at home?
Plan on a lash bath once a day, ideally at night to remove makeup residue, sebum, and debris before bed. If you wear heavy eye makeup or exercise frequently, a second gentle cleanse in the morning helps. Skipping daily cleaning lets buildup collect at the lash line, which weakens the adhesive bond and can lead to premature shedding or irritation.
What can I use if I don’t have eyelash extension cleanser?
A fragrance-free, oil-free foaming cleanser made for sensitive skin is the closest substitute. Avoid oil-based removers, micellar water with oils, and anything containing glycols or heavy emollients, since oils break down the adhesive bond. Rinse thoroughly with lukewarm water and air dry or use a lint-free cloth. Order a proper lash-safe cleanser as soon as you can for consistent results.
Can I just use water to clean my eyelash extensions?
Water alone rinses away loose debris but won’t break down sebum, makeup residue, or the proteins that collect along the lash line. Over time, that buildup weakens retention and can contribute to blepharitis. Use lukewarm water as part of the process, paired with a small amount of lash-safe cleanser and a soft-bristled brush, then rinse thoroughly and air dry.
Cleansing daily is the difference between a set that lasts five weeks and one that needs a fill in ten days. It’s a two-minute habit with an outsized payoff. If you’d rather have your aftercare handled by a master lash artist, book an appointment with Lashes by Shigeru and let our team set you up with the right cleanser, the right technique, and extensions that hold their shape.