
Best Lash Extensions for Everyday Glam: 2026 Guide
Table of Contents
- Quick Comparison: Best Lash Extensions for Everyday Glam
- How We Evaluated These Everyday Glam Lashes
- Lashes by Shigeru: Japanese AirLash® for Sensitive Eyes
- DIY Lash Kits vs. Professional Application: What Works for Daily Wear
- Natural Looking Lash Extensions 2026: Trends and Top Picks
- How Long Do Lash Extensions Last? Retention and Maintenance
- Best Lash Styles for Almond Eyes and Other Eye Shapes
- LED Lash Extension Benefits for Sensitive Eyes and Long Wear
- Frequently Asked Questions
Last Updated: September 11, 2026
Quick Comparison: Best Lash Extensions for Everyday Glam
Finding the best lash extensions for everyday glam comes down to one question: salon results that last weeks, or a DIY kit you apply at home? The trade-off is cost, skill, and longevity.
This guide from Lashes by Shigeru breaks down seven real options, from drugstore wisps to professional Japanese AirLash® sets. Below, we’ll show you exactly which style suits your eyes, how long each type lasts, and what most guides get wrong about sensitive eyes. One note upfront: our own pricing depends on the service and consultation, so check Lashes by Shigeru for current rates.
| Option | Starting Price | Wear Time | Best For |
|---|---|---|---|
| Lashes by Shigeru (AirLash®) | Varies by service | Up to 5 weeks | Sensitive eyes, natural glam |
| Ardell Seamless Underlash | $20 | Days | Budget everyday glam |
| Kiss Falscara Mini Kit | $17 | Short-term | Travel and touch-ups |
| ProLash DIY Extensions | $56 | 7+ days | Long-wear DIY |
| Eylure Wispy No. 117 | $11 | One day | Strip-lash wearers |
| Velour Effortless Natural | $20 | Reusable | Beginners |
| Professional Salon Extensions | $120 | Weeks | Low-maintenance glam |
How We Evaluated These Everyday Glam Lashes
We scored each option on retention, comfort, lash health, and how natural the finish looks in daylight.
Application technique matters as much as the product: under-lash application creates a seamless, bandless finish, while strip lashes sit on the lid line and read heavier. Fiber quality, curl intensity, and tapered tips separate wispy natural volume from an obviously glued-on set. We weighted lash health highest, daily wear should never cost you your natural lashes.
Lashes by Shigeru: Japanese AirLash® for Sensitive Eyes
For sensitive eyes and long wear, our Japanese AirLash® technique is the top pick: a virtually weightless application with hypoallergenic adhesives we manufacture in-house, so clients who reacted to standard glue often tolerate it comfortably.
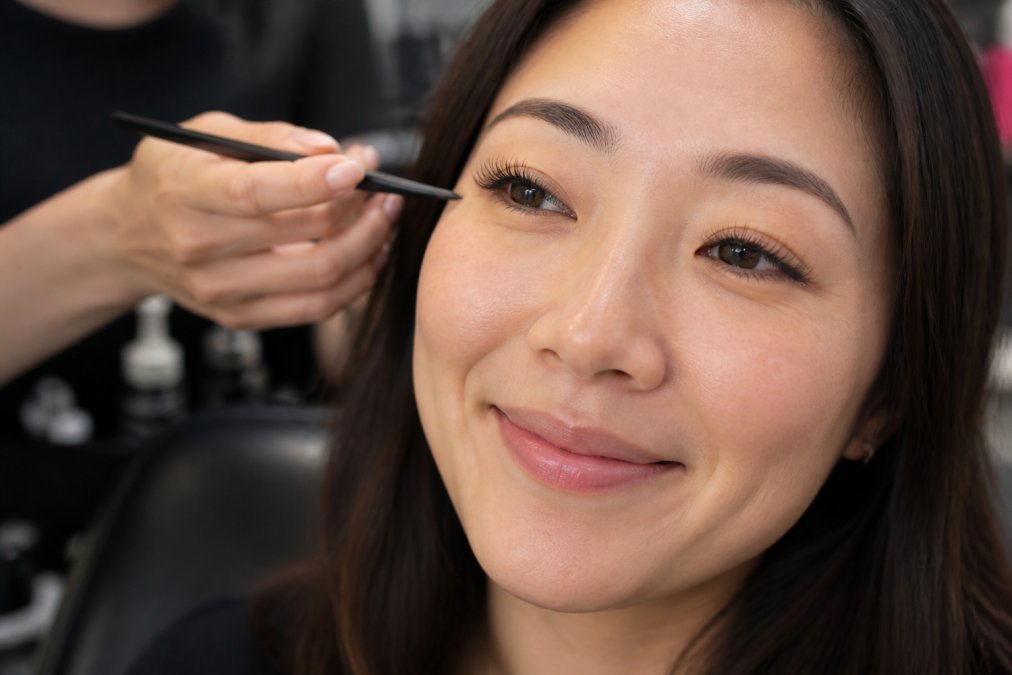
Master lash stylist Shigeru Hanai trained in Tokyo and New York City, and our LED AirLash® method was refined with salon client input. Results last up to five weeks with proper care. A common mistake is assuming all “Japanese techniques” are equal, AirLash® combines custom lash mapping, lightweight synthetic fibers, and adhesives formulated for daily wear.
DIY Lash Kits vs. Professional Application: What Works for Daily Wear
DIY lash kits win on price and flexibility; professional application wins on retention and lash health. Ardell’s Seamless Underlash ($20) uses under-lash application for a bandless look but demands steady hands. Kiss Falscara’s $17 mini kit travels well but suits shorter-term wear, while ProLash ($56) promises 7+ days from its bond formula.
Professional sets cost more upfront but last weeks instead of days. Transitioning to DIY means a learning curve in lash mapping and bond control.
Natural Looking Lash Extensions 2026: Trends and Top Picks
Natural looking lash extensions in 2026 lean toward wispy lashes, tapered tips, and low-density maps that mimic real growth, a polished office-ready look, not a full glam set.
Eylure’s Wispy No. 117 ($11) delivers a soft daily finish, and Velour’s Effortless Natural Collection ($20) offers pre-cut segments for beginners. Both are reusable with care. For a semi-permanent result, a classic or hybrid map gives natural volume without overwhelming the eye.
Reusable strip and cluster lashes can be worn many times if you clean the band with alcohol-free remover and store them in their tray. It’s a simple way to cut waste and cost.
How Long Do Lash Extensions Last? Retention and Maintenance
Lash extensions last up to five weeks for professional applications, depending on your growth cycle and aftercare. The better question is why they shed, understand the growth cycle and bond chemistry, and retention becomes manageable.
The Growth Cycle Is the Real Clock
Every natural lash lives through three phases, each behaving differently under an extension:
- Anagen (growth phase): the lash is actively lengthening. An extension applied here rides outward and can look longer within a week.
- Catagen (transition phase): growth stops and the follicle shrinks. Retention is weakest here, this is when most “random” sheds happen.
- Telogen (resting phase): the lash is fully grown and waiting to shed. An extension on a telogen lash falls out with it, usually within a few days.
Because lashes cycle independently, you lose a few per day no matter how well you care for them, that’s normal. A full set doesn’t “fail” at three weeks; it thins gradually as each lash reaches the end of its cycle. Professional fills are often scheduled every two to three weeks: enough natural lashes have cycled out to leave visible gaps.
Bond Chemistry: Why Some Sets Hold and Others Don’t
Retention hinges on bond quality, application technique, and how you treat them. The bond is a cyanoacrylate adhesive that cures by reacting with moisture in the air, which is why the first 24 hours matter: water, steam, or oil interrupts the cure.
- Humidity and temperature affect cure speed: a dry, cold room slows curing, a humid room speeds it up. That’s one reason the same set can behave differently in different salons.
- Oil is the enemy of the bond. Oil-based makeup removers, moisturizers, and cleansers break down cyanoacrylate over time (peer-reviewed research). Switch to oil-free formulas near the eye area.
- Waterproof bond vs. professional adhesive. DIY waterproof bonds tolerate moisture but are designed for short wear cycles. Professional adhesives cure faster and hold longer but demand precision, a sloppy bond with a fast-curing adhesive is worse than a clean bond with a slow one.
The Professional-to-DIY Transition Gap
Here’s the angle most guides miss: what do you do in the gap between a professional fill and your next appointment, or when transitioning from salon sets to DIY? This is where the “everyday glam” look either holds or collapses. hydrating beauty essence.
- Weeks 1-2 after a professional set: treat the set as fragile. No oil, no rubbing, no heavy mascara. Brush gently each morning with a clean spoolie.
- Week 3 (the gap): thinning shows at the outer corners first, since those lashes cycle fastest. A few DIY clusters placed only in the gaps can extend the look by several days without a full reapplication.
- Transitioning to full DIY: don’t strip a professional set to start DIY. Let it shed naturally, then begin on clean, extension-free lashes, clusters over existing extensions create uneven weight and can pull natural lashes.
- If you must remove early: use a proper lash adhesive remover, not picking or pulling, which is the fastest way to lose natural lashes along with the extensions.
Picking or pulling at loose extensions is the fastest way to lose natural lashes along with them (the American Academy of Dermatology). Let a technician remove them properly, or use a dedicated remover if you’re doing it at home.
Maintenance Habits That Actually Extend Wear
Lash maintenance is minimal once you build the habit: no rubbing, no picking, no heavy mascara. A few more habits make a measurable difference:
- Sleep on your back or use a silk pillowcase. Friction against cotton is a common cause of premature shedding on one side.
- Cleanse the lash line every few days with a lash-safe foam cleanser. Buildup of oils and dead skin weakens the bond from the base.
- Avoid waterproof mascara entirely. Removing it requires friction and solvent that damage the bond and the extension.
- Book fills on a schedule, not on a feeling. Waiting until the set looks sparse means more lashes have cycled out, a longer, more expensive fill.
Retention isn’t about finding a magic adhesive, it’s about respecting the growth cycle, protecting the bond from oil and friction, and planning fills around the cycle rather than reacting to visible gaps.
Best Lash Styles for Almond Eyes and Other Eye Shapes
The best lash styles for almond eyes use a natural, even map that follows the eye’s existing symmetry. Almond eyes suit almost any curl, so a soft C-curl with medium length flatters without effort. But eye shape is only half the map, face shape and brow-bone structure separate a set that reads “everyday glam” from one that reads “obviously applied.”
Start With the Eye Shape
A lash map is a plan for length, curl, and density across five zones: inner corner, inner-mid, center, outer-mid, and outer corner. Change the numbers and the same tray of lashes produces a completely different look.
- Almond eyes: the most flexible shape. A C-curl with a 9-11 mm inner-to-outer progression and even density keeps the natural symmetry intact. Avoid stacking extra length at the center, almond eyes already have it.
- Round eyes: a D-curl with a longer center (a “doll-eye” map) adds vertical lift and makes the eye read longer. Keep the inner corner short so the lift stays centered.
- Hooded eyes: a C-curl with a cat-eye map, shortest at the inner corner, longest at the outer, opens the outer corner and pulls visual weight away from the hood. Skip heavy center volume; it disappears under the fold.
- Monolid eyes: a J-curl with a doll-eye map keeps the finish open and airy. A stronger curl can cast a shadow on the lid, which flattens the eye instead of lifting it.
- Downturned eyes: a CC-curl with the longest point placed just past the outer third (not the very corner) lifts the outer edge without dragging it further down.
The Step Most Guides Skip: Face Shape and Brow Bone
Eye shape tells you how to map the lash line; face shape and brow bone tell you how far to push it. This is the layer competitors leave out, and it’s why the same set can look stunning on one person and heavy on another.
- Oval and heart-shaped faces: balanced proportions tolerate a slightly stronger outer curl and a touch more length. A cat-eye map reads intentional rather than accidental.
- Round faces: vertical lift matters more than horizontal length. A doll-eye or open-eye map with a stronger curl adds height and balances the face’s width.
- Square and angular faces: soft, rounded curls (C or CC) and a gradual, even map soften a strong jawline. Sharp, spiky maps amplify angularity.
- Long and oblong faces: avoid stacking length at the center, which stretches the face further. A cat-eye map that widens the outer corner adds horizontal balance.
Brow bone structure matters just as much. A prominent or low brow bone casts a shadow over the lash line, so a stronger curl (D or CC) keeps lashes visible in daylight. A high, flat brow bone leaves the lash line exposed, so a softer curl (J or B) reads more natural. If your brow bone sits close to your lash line, a weak curl disappears the moment you look down.
How to Build Your Own Map
You don’t need a salon to apply this. A lash map is a set of numbers, and you can write your own:
- Measure your eye. Note the width from inner to outer corner and where the highest point of your natural lash line sits. That high point is your “anchor”, the zone that gets the most length.
- Pick a curl. J and B for a soft, natural finish; C for the everyday-glam middle ground; CC and D for visible lift on hooded, round, or downturned eyes.
- Assign lengths by zone. A common everyday-glam progression is 8-9-10-11-10 mm for a cat-eye, or 8-9-11-10-9 mm for a doll-eye. Keep the jump between adjacent zones to 1-2 mm so the transition looks like natural growth.
- Set density last. Classic (one extension per natural lash) reads most natural; hybrid adds polish without weight. Full volume is rarely “everyday” unless the lashes are very fine.
- Test in daylight. Photograph the eye in natural light before committing to a full set, indoor lighting hides heaviness that daylight reveals.
If you wear glasses, add 1 mm of length at the outer corner and drop the curl one step. Frames already cast a shadow on the lash line, and a softer curl keeps the lashes from brushing the lens.
Eye shape analysis is the step most DIY kits skip, and it’s why the same lash set can look stunning on one person and heavy on another. A map tailored to eye shape, face shape, and brow bone together is what makes low-maintenance glam work.
LED Lash Extension Benefits for Sensitive Eyes and Long Wear
LED lash extension benefits come down to faster curing and less adhesive exposure: LED-cured adhesives set in seconds, meaning less fumes near the eye and a more comfortable appointment.
For sensitive eyes, that shorter curing window reduces irritation risk during application. Combined with hypoallergenic formulas, LED application supports lash health over repeated visits.
For sensitive eyes, LED-cured adhesive plus a hypoallergenic formula is the combination that makes long-wear extensions tolerable, not just the fiber type.
Frequently Asked Questions
What are the best lashes for daily wear?
For daily wear, lightweight options like classic or hybrid extensions applied by a professional are ideal. DIY under-lash kits such as Ardell Seamless or Kiss Falscara also work well for shorter-term wear. The key is choosing a style that feels virtually weightless, like Japanese AirLash® extensions, so you forget you’re wearing them. Natural-looking lash extensions 2026 trends favor soft, wispy styles that enhance your eyes without looking heavy.
How long do lash extensions last?
Professional lash extensions typically last up to five weeks, depending on your natural lash growth cycle and aftercare. LED-cured extensions can offer improved retention because the adhesive sets faster and more securely. DIY options range from one day for strip lashes to seven days for systems like ProLash. To maximize longevity, avoid oil-based products near the eyes and schedule touch-ups every two to three weeks.
Are LED lash extensions better for sensitive eyes?
LED lash extension benefits include faster adhesive curing, which reduces exposure to uncured glue fumes that often trigger irritation. For sensitive eyes, LED-cured extensions paired with hypoallergenic adhesives are a strong choice.
How do I choose the right lash style for my eye shape?
For almond eyes, styles that taper at the inner and outer corners, like cat-eye or natural volume, work beautifully. Round eyes benefit from longer lashes at the center for elongation, while hooded eyes look best with a curl that opens the eye, such as C-curl or D-curl. Lash mapping is the process of customizing length and curl across the lash line. A professional can map lashes to complement your specific eye shape.
Can I transition from professional lash extensions to DIY?
Yes, many people transition to DIY lash kits for flexibility or cost savings. Start with a beginner-friendly kit like Kiss Falscara or Velour Effortless Natural. Practice application on clean, makeup-free lashes, and use a bond and seal system for better retention. If your natural lashes feel weak after removing extensions, give them a break and use a lash serum to support regrowth before starting DIY.
Choosing the best lash extensions for everyday glam means balancing retention, comfort, and how natural the result looks on your eye shape. If sensitive eyes or past reactions have made you wary, Lashes by Shigeru offers hypoallergenic, virtually weightless Japanese AirLash® sets with results that last up to five weeks, plus in-house growth serums and skin elixirs to support lash health. Book an appointment with Lashes by Shigeru and get a custom lash map built for your eyes.