
How to Remove Eye Makeup with Lash Extensions
Table of Contents
- What You’ll Need Before You Start
- Step-by-Step: How to Remove Eye Makeup with Lash Extensions
- Best Oil-Free Makeup Remover for Lash Extensions
- Why Do Lash Extensions Fall Out?
- Lash Extension Aftercare Routine
- Removing Waterproof vs. Non-Waterproof Makeup
- Common Mistakes That Damage Lash Extensions
- Troubleshooting Residue Buildup and Post-Removal Lash Care
- Frequently Asked Questions
Last Updated: September 22, 2026
What You’ll Need Before You Start
Removing eye makeup without wrecking your lash extensions comes down to one rule: keep oil away from the adhesive bond. Oil-based products break down the glue that holds each extension to your natural lash, which is the fastest route to premature shedding. At Lashes by Shigeru, we tell every client the same thing on day one: your cleansing routine decides how long your set lasts.
Gather these tools before you touch your eyes:
- An oil-free cleanser or foaming lash wash
- A soft, lint-free brush or clean spoolie brush
- Microfiber pads or lint-free cotton alternatives
- A small bowl of lukewarm water
- A clean towel or fan for air drying
Cotton pads and cotton balls catch on extensions and pull them loose. The fibers also shed into the lash line, where they trap makeup residue and irritate the eyelid margin.
Step-by-Step: How to Remove Eye Makeup with Lash Extensions
A safe removal takes about three minutes. Work slowly, use gentle strokes, and let the cleanser do the dissolving instead of rubbing.
Step 1: Wash Your Hands and Prep the Area
Wash your hands with soap and warm water first. Clean hands stop bacteria from reaching the lash follicles and eyelid margin.
Step 2: Dissolve Makeup with an Oil-Free Cleanser
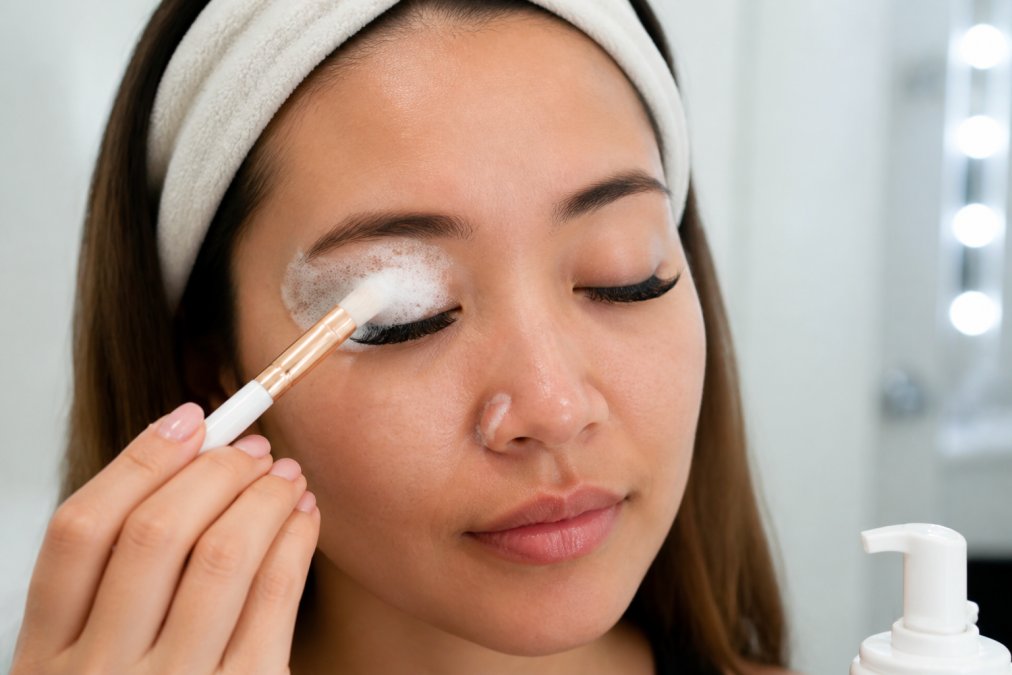
Dispense one pump of oil-free cleanser onto your fingertips or a soft brush. Close one eye and apply the cleanser along the lash line with gentle strokes.
Step 3: Clean the Lash Line and Eyelid Margin
Sweep the brush downward from the base of the lashes to the tips. Use light pressure and short strokes.
Step 4: Rinse and Air Dry
Rinse thoroughly with lukewarm water until no cleanser remains. Cool water works too, but hot water weakens the adhesive bond.
Best Oil-Free Makeup Remover for Lash Extensions
The best oil-free makeup remover for lash extensions is a water-based, fragrance-free foaming lash wash made for extension wearers. These formulas clear makeup without touching the adhesive bond, and they rinse clean.
Check the label for these traits:
- Oil-free and alcohol-free so the bond stays intact
- Fragrance-free for sensitive skin and eyes
- pH-balanced to protect lash health
- Water-based so it rinses without residue
Double cleanse on days you wear full eye makeup. First pass lifts the makeup, second pass cleans the lash line. On light days, one pass is enough.
Why Do Lash Extensions Fall Out?
Lash extensions fall out for two reasons: natural lash shedding and adhesive breakdown. Your natural lashes shed on a cycle, so losing a few extensions a day is normal. The rest comes down to aftercare.
The usual culprits:
- Oil-based products near the eyes
- Rubbing or pulling at the lashes
- Sleeping face-down on the lashes
- Skipping regular cleanses, which lets residue build up
- Waiting too long between touch-ups
Lash Extension Aftercare Routine
A lash extension aftercare routine is a short daily habit, not a project. Clean lashes last longer, look better, and stay comfortable.
Your daily routine:
- Cleanse the lash line once a day with a foaming lash wash.
- Brush the lashes with a clean spoolie brush each morning.
- Keep oil-based skincare and eye creams away from the lash line.
- Sleep on your back or on a silk pillowcase.
- Book touch-ups every two to three weeks.
Removing Waterproof vs. Non-Waterproof Makeup
Here’s how the two categories actually behave on extensions:
| Makeup Type | Why It Resists | Cleanser Approach | Soak Time | Pressure |
|---|---|---|---|---|
| Powder shadow | Sits on skin surface | One pass, foaming wash | 15-20 seconds | Light |
| Cream shadow | Binds to skin oils | One pass, foaming wash | 20-30 seconds | Light |
| Non-waterproof mascara | Water-soluble polymers | One pass, sweep base to tip | 30 seconds | Light |
| Waterproof mascara | Waxes and dimethicone | Two passes, soak, then comb | 60-90 seconds | Light |
| Waterproof gel liner | Film-forming polymers | Soak, then sweep along lash line | 90 seconds | Light |
| Long-wear liquid liner | Acrylate copolymers | Soak, then sweep, repeat if needed | 90-120 seconds | Light |
- Work one eye at a time. Close the eye, apply cleanser, and let it sit. If you try to do both eyes at once, the first eye dries out before you get back to it.
- Soak, don’t scrub. Apply cleanser along the lash line and lid, then wait the full soak time before you touch the lashes. The cleanser does the work; your brush just carries away what’s already loosened.
- Comb, don’t pull. For waterproof mascara, after the soak, use a clean spoolie to comb from base to tip. This separates the softened formula from the extensions instead of dragging it through them.
- Repeat, don’t press. If product remains after one pass, apply more cleanser and wait again. Adding pressure is what pulls extensions loose and irritates the eyelid margin.
- Watch the inner corner. Waterproof liner pools at the inner corner and the lower lash line, where extensions are shortest and most fragile. Use the tip of your brush there, not the flat side.
Time dissolves waterproof makeup. Pressure does not. If the product won’t budge, add more soak time instead of more force.
One more distinction worth knowing: “water-resistant” and “waterproof” are not the same claim. Water-resistant formulas (common in drugstore mascaras) often lift with a single 30-second soak. Waterproof formulas (typically labeled “waterproof” or “24-hour”) usually need the full two-pass routine. If you’re not sure which you’re wearing, start with one pass and add a second only if residue remains. Persistent scrubbing to remove stubborn pigment can compromise the delicate barrier around the eyes, making a gentle approach to soothing sensitive skin essential for maintaining long-term lash health.
Common Mistakes That Damage Lash Extensions
The biggest mistake is treating extensions like natural lashes. They need gentler handling, oil-free products, and a consistent cleansing routine. Most damage traces back to a handful of habits.
Watch for these:
- Using oil-based makeup removers or cleansing balms
- Rubbing the eyes with a towel
- Picking or pulling at loose extensions
- Skipping the lash line during cleansing
- Sleeping face-down
- Using a mechanical lash curler on extensions
Troubleshooting Residue Buildup and Post-Removal Lash Care
Most guides stop at removal. The harder problem is what to do when residue is already trapped at the base of the lashes, and how to reset the lash shape after cleaning so the set still looks fresh. This section covers both.
How to Tell You Have Residue Buildup
Residue shows up in predictable ways:
- Clumping at the base. Extensions that were fanned out at your appointment start sticking together in groups of two or three.
- A dull or grayish finish. Clean extensions catch light; residue-coated ones look matte or cloudy.
- A gritty or tacky feel when you run a clean spoolie through the lashes.
- Itching or a heavy feeling along the lash line, especially by end of day.
- Shortened retention. If you’re losing more extensions than usual between touch-ups, buildup at the base is often the cause, because it traps natural oils and debris against the adhesive bond.
Why Residue Gets Trapped
Three mechanisms account for most buildup:
- Cleanser never reached the base. Foam sits on the tips of the lashes but doesn’t penetrate to the lash line, so makeup and skin oils accumulate where the extension meets the natural lash.
- The rinse step was skipped or rushed. Cleanser residue itself becomes a sticky film that attracts dust and dead skin cells.
- Oil-based skincare migrated into the lash line. Eye creams, facial oils, and moisturizers applied above the cheekbone can travel upward overnight and deposit on the adhesive bond.
The Fix: A Targeted Double Cleanse
- First pass, soften. Apply oil-free foaming lash wash to the lash line with a soft brush. Let it sit 30 seconds. This loosens the top layer of residue.
- Second pass, reach the base. Use a clean spoolie dipped in cleanser to work along the lash line in small sections, root to tip. The spoolie bristles get between extensions in a way a flat brush can’t.
- Rinse thoroughly with lukewarm water. Tilt your head back so water runs away from the eyes, not into them.
- Check with a spoolie. Comb through dry lashes. If they still clump, repeat the second pass once. If buildup persists after two attempts, stop, repeated manipulation is more damaging than the residue itself.
Do not pick, scrape, or use tweezers on buildup at the base. You will pull the natural lash out with the extension, and the natural lash takes weeks to grow back.
If two double cleanses over two days don’t clear it, book a professional cleanse with your lash artist. They have tools and solvents formulated for the adhesive bond that aren’t sold at retail.
Post-Removal Lash Care: Resetting the Shape
Cleansing disturbs the fan pattern your artist built. A few minutes of resetting keeps the set looking intentional instead of slept-in.
- Fluff with a spoolie while damp. Immediately after rinsing, while lashes are still slightly wet, comb from base to tip with a clean spoolie. This is when the fan pattern is most pliable.
- Separate any stuck pairs. If two extensions are stuck together, use the spoolie tip to gently nudge them apart. Don’t pull.
- Air dry completely before applying anything. A cool-setting fan speeds this up. Lashes that stay damp at the base can develop a musty smell and weaken the bond.
- Skip eye cream on cleanse nights, or apply it well below the orbital bone. This is the single most common cause of recurring buildup.
- Brush again in the morning. A quick spoolie pass after your morning routine resets any lashes that shifted overnight.
When to Book a Professional Cleanse
Book with your lash artist rather than escalating at home if:
- Buildup is visible as a dark line along the lash line
- Extensions are stuck together in clusters of four or more
- You feel itching, tenderness, or a gritty sensation that doesn’t resolve after one cleanse
- You’ve been wearing the set for more than three weeks without a touch-up
If your extensions feel stiff or tacky after cleansing, you likely didn’t rinse thoroughly. Rinse again with lukewarm water and air dry.
Frequently Asked Questions
Can I use eye makeup remover with eyelash extensions?
Yes, but only if it is oil-free. Oil-based products break down the adhesive bond that holds your lash extensions in place, causing premature shedding. Look for a foaming lash wash or an oil-free cleanser labeled safe for extensions. Avoid cotton pads and cotton swabs because their fibers can snag the extensions and pull them out. Apply the remover with a soft lint-free brush or your fingertips using gentle strokes, then rinse thoroughly with lukewarm water.
How do I remove waterproof eyeliner without ruining my lash extensions?
Waterproof makeup needs a dedicated oil-free makeup solvent, not oil-based removers. Soak a lint-free pad or disposable lip brush with the solvent and press it against the eyelid for a few seconds to dissolve the product. Wipe downward and away from the lash line using gentle strokes. Never rub back and forth across the extensions. Follow with a foaming lash wash to remove any leftover residue, then air dry your lashes completely before brushing them with a clean spoolie.
Why do my lash extensions fall out after a week?
Extensions typically shed with your natural lash cycle, which replaces a few lashes daily. But early, excessive fallout usually points to aftercare issues: oil-based products breaking the adhesive bond, rubbing your eyes, or skipping cleansing so debris builds up at the lash follicles. Waterproof mascara and harsh makeup removers speed up the process too. Following a proper lash extension aftercare routine, including oil-free cleansing and gentle drying, helps extensions last up to five weeks.
How often should I clean my lash extensions?
Cleanse your lashes daily if you wear eye makeup, and at least every two to three days otherwise. A foaming lash wash removes makeup residue, oil, and debris that weaken the adhesive bond and irritate the eyelid margin. Use gentle strokes along the lash line with a soft brush, rinse thoroughly, and air dry. Regular cleansing also supports lash health and keeps retention strong between touch-up appointments.
Removing eye makeup around lash extensions takes three minutes and one rule: no oil, no rubbing. Get that right and your set holds its shape for weeks. If you’d rather leave the details to a professional, Lashes by Shigeru offers the proprietary Japanese AirLash® technique, hypoallergenic adhesives made in-house, and results that last up to five weeks. Book an appointment and let our master lash artists handle the rest.